When installing a toilet, understanding various types, measuring space accurately, choosing efficient and durable models, gathering necessary tools and materials, preparing plumbing connections, following installation steps, testing thoroughly, making final adjustments, and performing regular maintenance are key to a successful Toilet Installation. Considerations like water conservation, environmental impact, and user comfort ensure a functional, efficient, and sustainable toilet that enhances any bathroom.
Residential toilet installations are not just about swapping out an old unit; it’s a project that demands careful consideration of multiple factors. From understanding your toilet options and measuring for the perfect fit, to choosing the right model for efficiency and durability, each step is crucial for a seamless upgrade. This comprehensive guide walks you through the entire process, from selecting the best toilet type to final touches and maintenance tips, ensuring a smooth transition with minimal hassle. Discover expert insights on plumbing connections, troubleshooting common issues, and more, all tailored to your residential toilet installation needs.
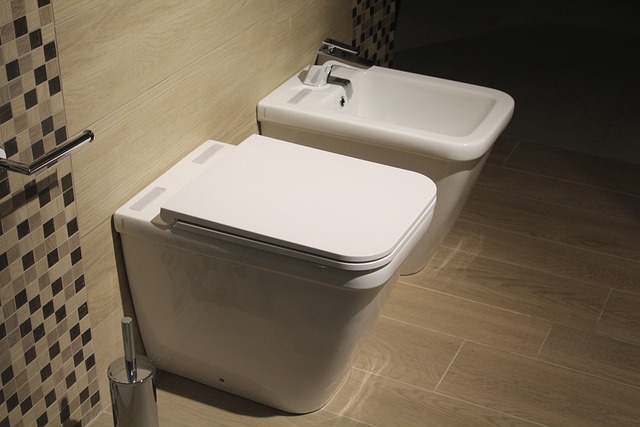
Understanding Your Toilet Options: Types and Styles

When considering a toilet installation, understanding your options is key. Toilets come in a variety of types and styles designed to cater to different needs and preferences. From traditional gravity-flush models to modern low-flow or waterless toilets, each design offers unique features and benefits. Gravity flush toilets are the most common, utilizing water pressure to sweep waste through the drain; these are known for their reliability and cost-effectiveness.
Low-flow or dual-flush toilets are growing in popularity due to their water conservation capabilities. They offer a smaller, more eco-friendly flush option for liquid waste and a stronger flush for solids. Waterless toilets, while less conventional, eliminate the need for water entirely, making them ideal for remote areas or situations where water is scarce. When exploring toilet installations, consider your lifestyle, budget, and environmental impact to select the best fit.
Measuring for the Perfect Fit: Space Considerations
When planning a toilet installation, precise measuring is key to achieving a perfect fit. Before purchasing any fixtures, it’s crucial to assess the available space in your bathroom or desired location. This involves taking accurate measurements of the existing plumbing connections and the overall dimensions of the area where the toilet will be installed.
Consider factors such as the width and depth of the bathroom, clearance for the toilet’s flush mechanism, and any nearby obstacles like cabinets or walls. By carefully considering these space requirements, you can ensure that your chosen toilet, including its mounting hardware, will fit seamlessly without hindering accessibility or causing discomfort during use. Accurate measurements are essential for a successful toilet installation.
Choosing the Right Toilet: Efficiency and Durability

When undertaking a toilet installation, choosing the right model is paramount. Efficiency and durability are key factors to consider in this process. Modern toilets come with various features designed to conserve water, which not only reduces utility costs but also benefits the environment. Look for models that sport WaterSense certification, indicating they meet EPA standards for water efficiency.
In terms of durability, opt for high-quality materials and robust construction. Ceramic toilets, for instance, are known for their longevity and resistance to chips and cracks. Additionally, consider the flush mechanism; gravity-fed systems generally offer more powerful and efficient flushing compared to pressure-assisted ones, ensuring a cleaner and more reliable performance over time.
Installation Tools and Materials Required
When undertaking a toilet installation, there are several essential tools and materials required to ensure a successful and durable fit. At the very least, you will need a new toilet, an appropriate size of waste pipe connections, various types of glue or seals for joining pipes, and wrenches or pliers for securing fittings. For a more comprehensive and professional job, consider adding a toilet ring or base for added support, along with a range of tools like a level, measuring tape, and a utility knife.
The specific tools and materials can vary slightly based on the type of toilet and waste system in place, but having these fundamentals on hand is crucial for any toilet installation project. Always ensure compatibility between your chosen toilet model and the existing plumbing layout to avoid costly errors or blockages down the line.
Step-by-Step Guide to Residential Toilet Installation
Toilet Installation: A Comprehensive Step-by-Step Guide
The process of installing a new toilet in your residential property can seem daunting, but with careful planning and a systematic approach, it is entirely manageable. Here’s a simplified guide to ensure a smooth installation. First, gather all the necessary tools and materials, including the new toilet, an adjustable wrench, pliers, a level, and plumbing supplies specific to your setup. Clear the bathroom area of any obstacles and ensure proper ventilation. Next, shut off the water supply to prevent leaks during the process. Remove the old toilet with care, uncoupling it from the floor and drainage pipes. Inspect the existing layout and mark the position for the new toilet, ensuring it aligns with the plumbing lines.
Now, install the toilet’s mounting hardware, following the manufacturer’s instructions. Secure the toilet base to the floor using appropriate fasteners. Connect the drainage pipes, ensuring a watertight seal. Reattach the water supply lines, turning on the valve to test for any leaks. Adjust the toilet’s level and make final adjustments as needed. With all connections secure, flush the toilet for the first time to ensure everything functions correctly. This step-by-step approach will guide you through the process, ensuring a successful residential toilet installation without professional assistance.
Plumbing Connections: Supply Lines and Waste Pipes

When undertaking a toilet installation, understanding plumbing connections is paramount. The process begins with establishing reliable supply lines for fresh water and ensuring proper waste pipe connections to facilitate efficient flushing. For residential installations, standard pipes include copper, PVC, or PEX, each with unique advantages. Copper, known for its durability, is suitable for both cold and hot water applications. PVC is cost-effective and versatile, ideal for cold water supply lines. PEX, a flexible option, allows for easy routing through tight spaces and can withstand extreme temperatures.
Properly connecting these lines to the toilet involves precise measurements and fittings. The supply line connects to the toilet’s fill valve, while the waste pipe is attached to the drain, typically using a siphon or trap to prevent sewer gases from entering the bathroom. Ensuring these connections are secure and sealed is crucial to avoid leaks and maintain the integrity of the Toilet Installation.
Testing and Adjusting: Ensuring a Seamless Performance

After completing the toilet installation, it’s crucial to test and adjust the new fixture for seamless performance. Start by checking all connections to ensure they’re secure and tight, addressing any leaks immediately. Fill the tank and observe if the flush mechanism operates smoothly, releasing the necessary water volume without overflow or clogs.
Adjust the float valve as needed to control the water level in the tank. Ensure it stops filling at the appropriate mark. Test the flush lever’s response, verifying it lifts the flush valve securely and allows water to discharge efficiently. If adjustments are required, make them carefully, referring to the manufacturer’s instructions for optimal results.
Final Touches and Maintenance Tips
After completing the toilet installation, it’s time to add those final touches that will make your new bathroom a functional and inviting space. Ensure all connections are secure, and check for any leaks around the base of the toilet. Place the lid and seat on the toilet and adjust them to your preference; this simple step can significantly impact the overall user experience. Consider adding soft-close seats for a luxurious touch, reducing noise, and preventing accidents.
Regular maintenance is key to keeping your newly installed toilet in top condition. Schedule routine cleaning to prevent buildup and odours. Use toilet bowl cleaners that are safe for septic systems or those labelled as environmentally friendly. Avoid flushing non-biodegradable items to protect your plumbing and the environment. Regularly inspect the water level in the tank and adjust it as needed, ensuring you’re not wasting water.
Common Issues and Troubleshooting for New Installations

When installing a new toilet, common issues can arise from improper leveling, leading to a misaligned flush, or incorrect water supply connections, causing flushing problems. Before you dive into any troubleshooting, double-check that the toilet is level and properly secured. Ensure all water lines are connected securely to both the toilet and your home’s plumbing system, checking for leaks at every connection. If you encounter persistent clogs or overflows, it might be due to a blocked drain pipe or an improper slope of the sewer line. Identifying and clearing blockages using tools like plungers or chemical drain cleaners is often a quick fix. However, if issues persist, professional assistance from a licensed plumber may be required to diagnose more complex problems related to your toilet installation.